Easy Homemade Marshmallows
♥ May contain affiliate links or sponsored content. Please see my privacy policy and affiliate disclosure.
Soft, fluffy, and naturally sweetened with maple syrup—these homemade marshmallows are unbelievably easy to make and are perfect for hot cocoa, gifting, or snacking.

I am not a big fan of store-bought marshmallows. Sure, I’ll buy them every now and then to make s’mores or to add to my hot cocoa, but you’ll never catch me eating them straight from the bag.
However, homemade marshmallows are a different story. Not only are they incredibly delicious on a s’more or in hot cocoa, but they’re also a delicious little snack all on their own.

Why You’ll Love These Homemade Marshmallows
These homemade marshmallows taste so good, and once you try them, you’ll never want to buy store-bought marshmallows again.
They’re also much healthier for you than store-bought marshmallows.
They contain only six ingredients, compared with store-bought marshmallows, which typically have up to ten ingredients and may include corn syrup, artificial flavors, and artificial colors.

Maple syrup is used to sweeten these homemade marshmallows, which is a healthier alternative to sugar and corn syrup.
Maple syrup contains trace minerals (manganese, zinc, potassium, calcium), has polyphenols/antioxidants, has a lower glycemic impact than white sugar (although it can still raise blood sugar), and it is made from a single natural ingredient.
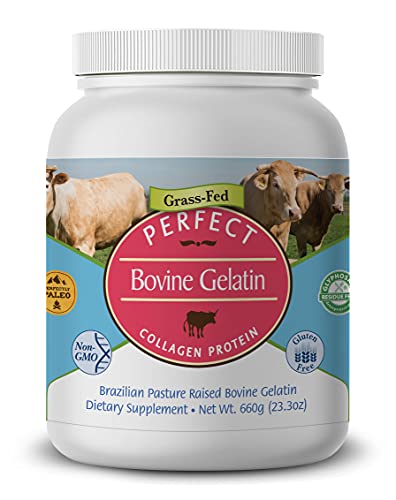
And my favorite thing about these homemade marshmallows, besides the flavor, is that they are made with grass-fed beef gelatin.
Grass-fed beef gelatin is loaded with protein and amino acids. It can help promote healthy brain function, improve digestion, promote younger, fuller skin, support joint health, and more.
Ingredients You’ll Need
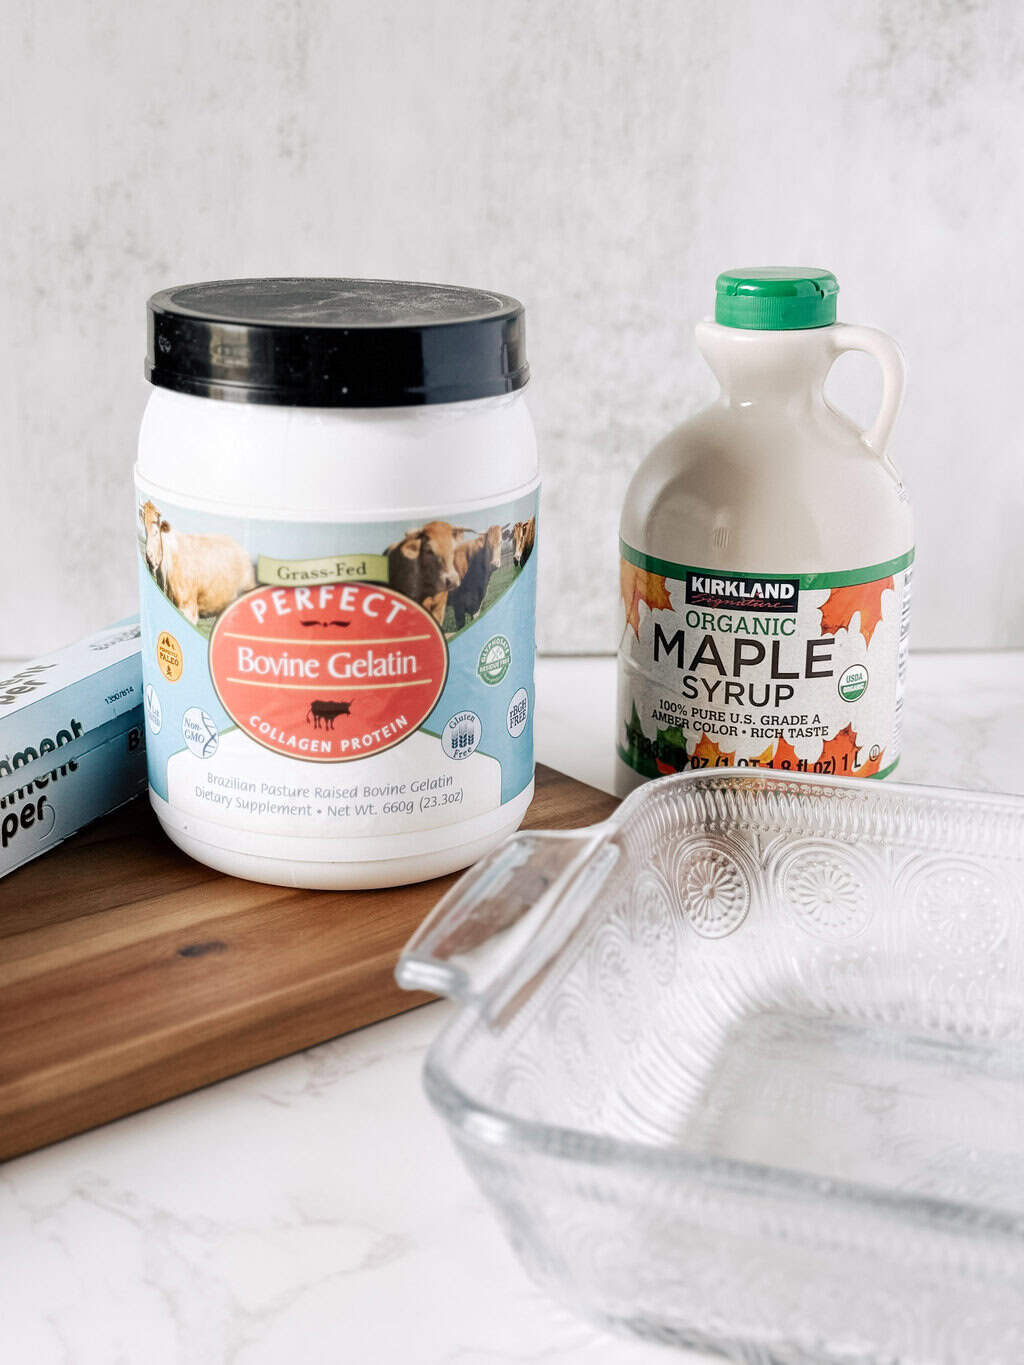
To make these yummy homemade marshmallows, you’ll need the following ingredients and supplies.
- 3 tablespoons of grass-fed beef gelatin
- 1 cup of maple syrup
- 1 cup of water (divided)
- 1/4 teaspoon of sea salt
- 1 teaspoon of vanilla extract
- 1/2 cup of powdered sugar or arrowroot powder
- parchment paper
- 8×8 dish
- hand mixer or stand mixer
- candy thermometer
Grass-Fed Beef Gelatin
Gelatin is absolutely necessary for this recipe. I prefer and recommend grass-fed beef gelatin for its significant health benefits.
Grass-fed beef gelatin has a much better nutritional profile than grain-fed beef gelatin and pork gelatin.
However, not all grass-fed beef gelatin is created equal. Some brands contain glyphosate residue, and some come from cows that were given hormones and antibiotics.
I buy grass-fed beef gelatin from Perfect Supplements.
Their beef gelatin is 100% all-natural and free of pesticides, hormones, chemicals, and contaminants.
It is non-GMO and glyphosate-free. The beef gelatin also comes from Brazilian grass-fed cows.
They also provide proof of all their claims with certificates.
You can click here to learn more about Perfect Supplements’ beef gelatin.
Maple Syrup
Maple syrup is used to sweeten these marshmallows and make them super yummy!
Water
Water is needed to bloom the gelatin and also to dilute the maple syrup.
Sea Salt
Sea salt is optional, but it can enhance the flavor of these homemade marshmallows and is highly recommended.
Vanilla Extract
Vanilla extract also enhances the flavor of these easy homemade marshmallows.
Powdered Sugar (or Arrowroot Powder)
Powdered sugar helps prevent the marshmallows from sticking to the dish and is also used to coat them after they’ve been cut into squares.
You can use arrowroot powder instead of powdered sugar if you prefer.
Other Items You’ll Need
Parchment Paper
Parchment paper is needed to line the baking dish so the marshmallow doesn’t stick to the dish. You can spray the dish with cooking spray if you prefer, but parchment paper works better in my experience.
8×8 Dish
Of course, youll need a dish to pour the marshmallow into so that it can set. An 8×8 dish is recommended.
Hand Mixer or Stand Mixer
A mixer is 100% necessary to whip these homemade marshmallows. Either a stand or a hand mixer will work. I use a hand mixer I purchased from Big Lots over 20 years ago, and it works just fine 🙂
Candy Thermometer
A candy thermometer is strongly recommended. Without it, it’s difficult to know when the syrup has reached the correct temperature for proper setting.
How to Make Homemade Marshmallows
To get started on these easy homemade marshmallows, line your baking dish with parchment paper.
Next, sprinkle the parchment paper generously with powdered sugar or arrowroot powder.

Then add a 1/2 cup of water, 1 cup of maple syrup, and 1/4 teaspoon of sea salt to a saucepan.
Cook over low to medium heat until it reaches 240°F. This will take 15-20 minutes. Keep it on low to medium heat and don’t stir.
I like to use a thermometer to check the temperature, although it’s not 100% necessary. If you don’t have one, make sure it’s heated for at least 15-20 minutes.


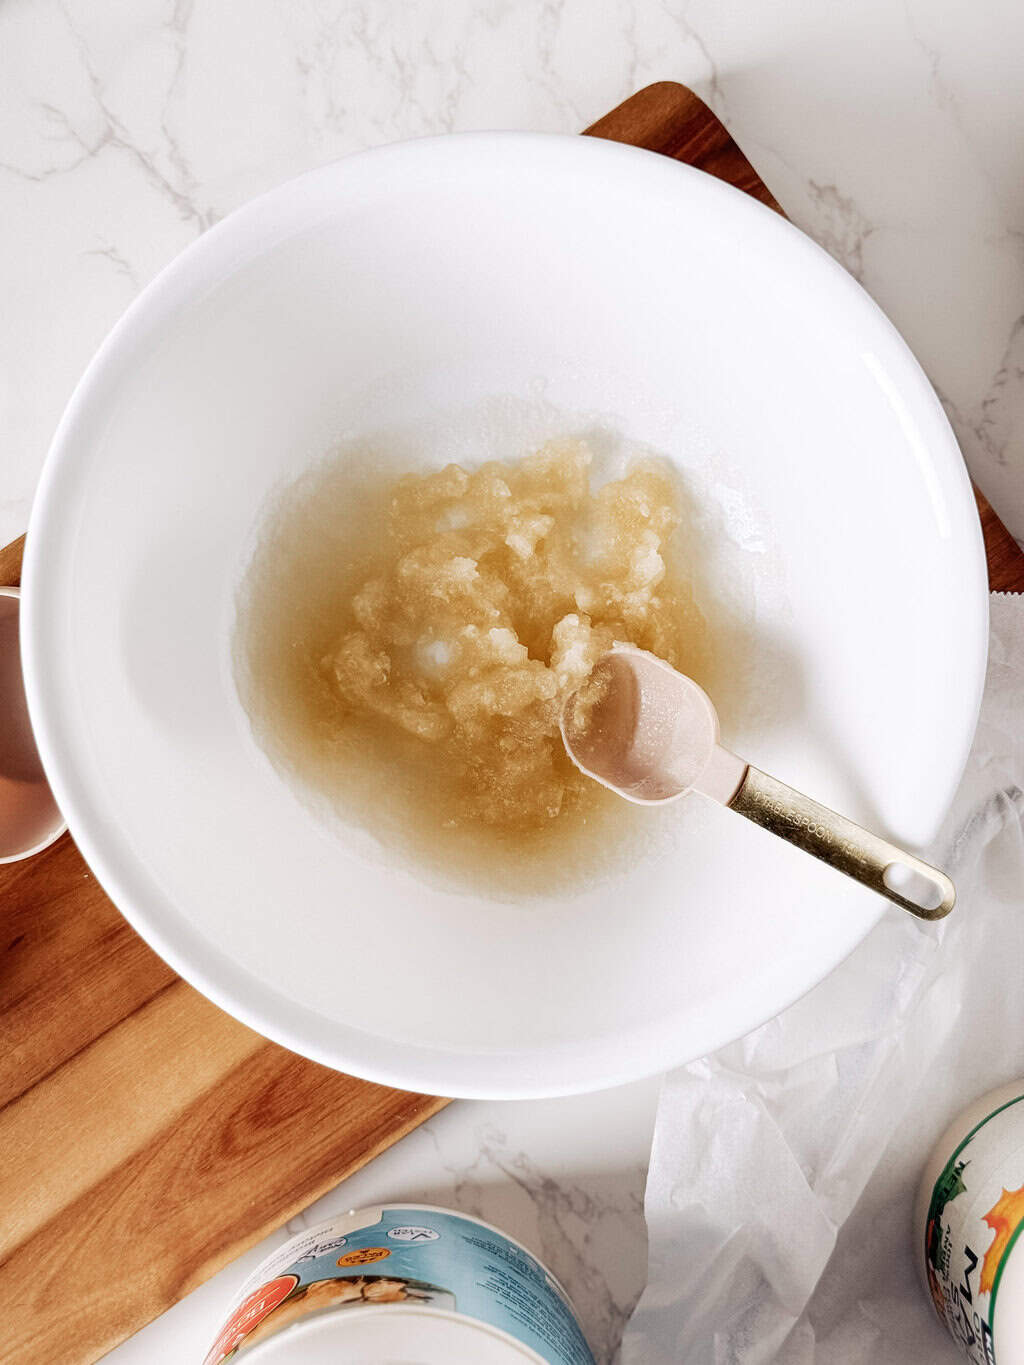
While the syrup mixture is heating, add a 1/2 cup of water to a medium to large bowl if you’re using a hand mixer, or to the stand mixer bowl if you’re using a stand mixer.
Then sprinkle 3 tablespoons of gelatin into the water.
Carefully stir the gelatin into the water until there are no dry chunks. Allow the gelatin to bloom for at least 10 minutes.


When the syrup mixture reaches 240°F, turn off the heat.
With the mixer on low, slowly pour the hot syrup into the bloomed gelatin.

Increase speed to high and whip for 7–10 minutes. Mix in 1 teaspoon of vanilla extract during the last 30 seconds. Stop mixing when the marshmallow is thick, glossy, and fluffy. This should take around 7-10 minutes.
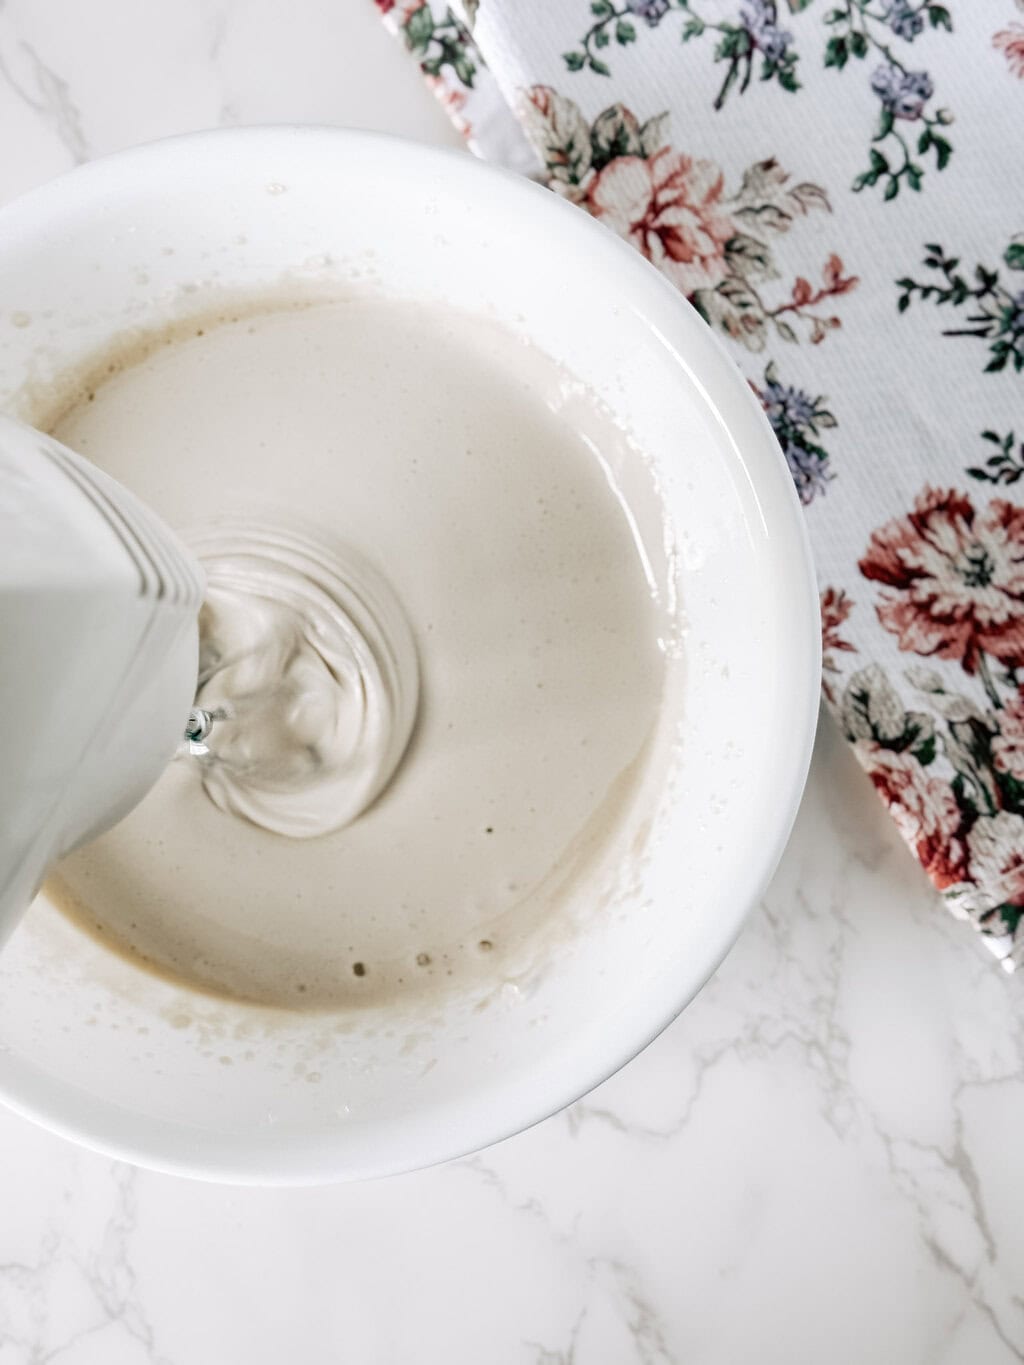
This is the tricky part. If you over-whip, the marshmallow will begin to set too quickly and become too sticky to pour into the dish.
If you don’t whip it enough, the marshmallow will have too much moisture and won’t set properly.
Whip just until thick and fluffy. When drizzled back into the bowl, the marshmallow should briefly hold its shape before slowly melting back into itself.
Then quickly (very, very quickly) pour the marshmallow into the parchment-lined dish. Quickly smooth out the top with a spatula, then dust it lightly with powdered sugar.
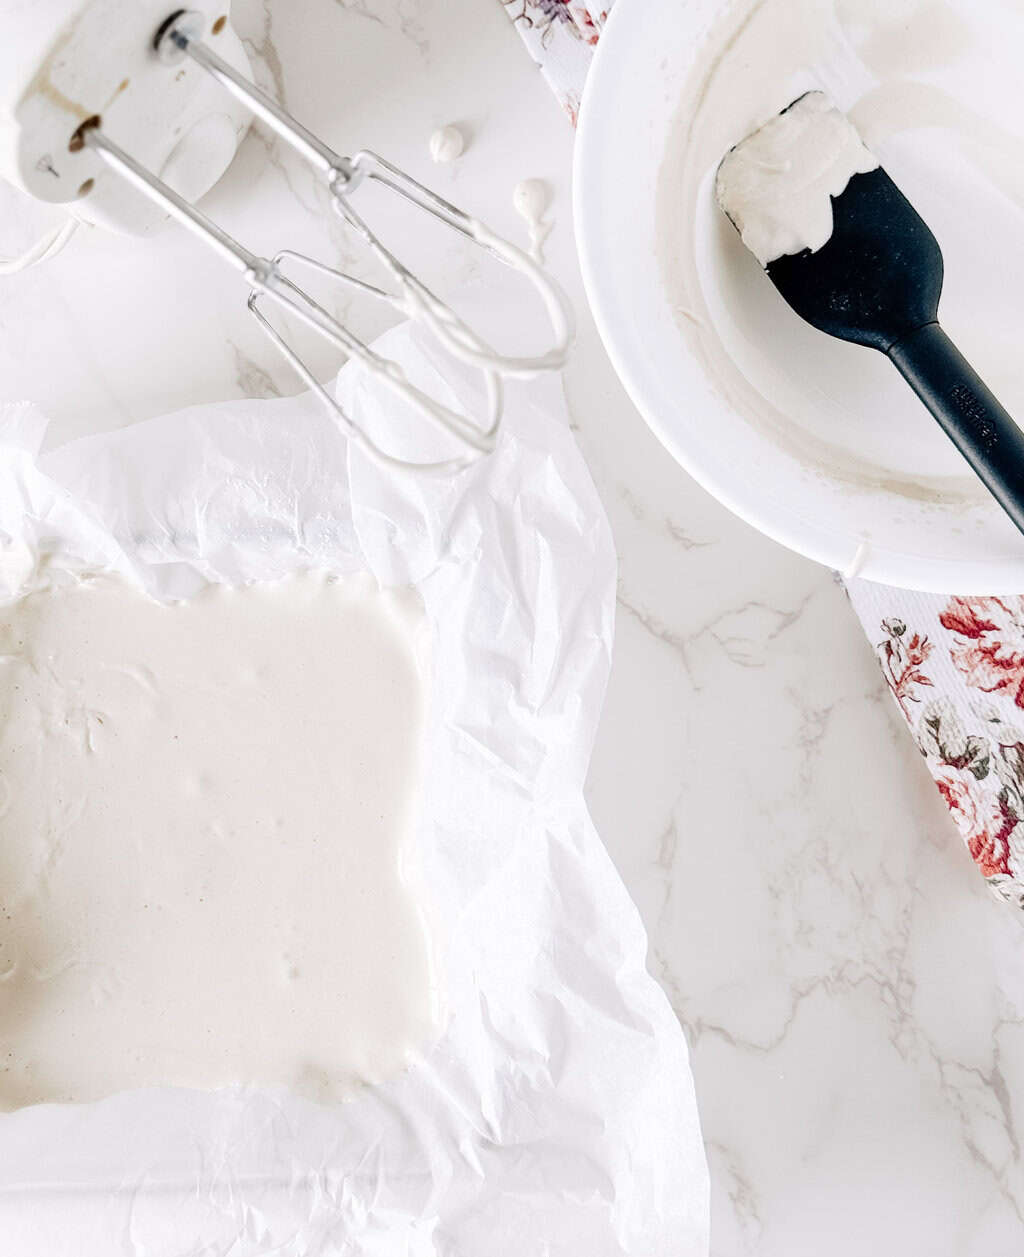

Let it set uncovered at room temperature for 4–6 hours or preferably overnight.
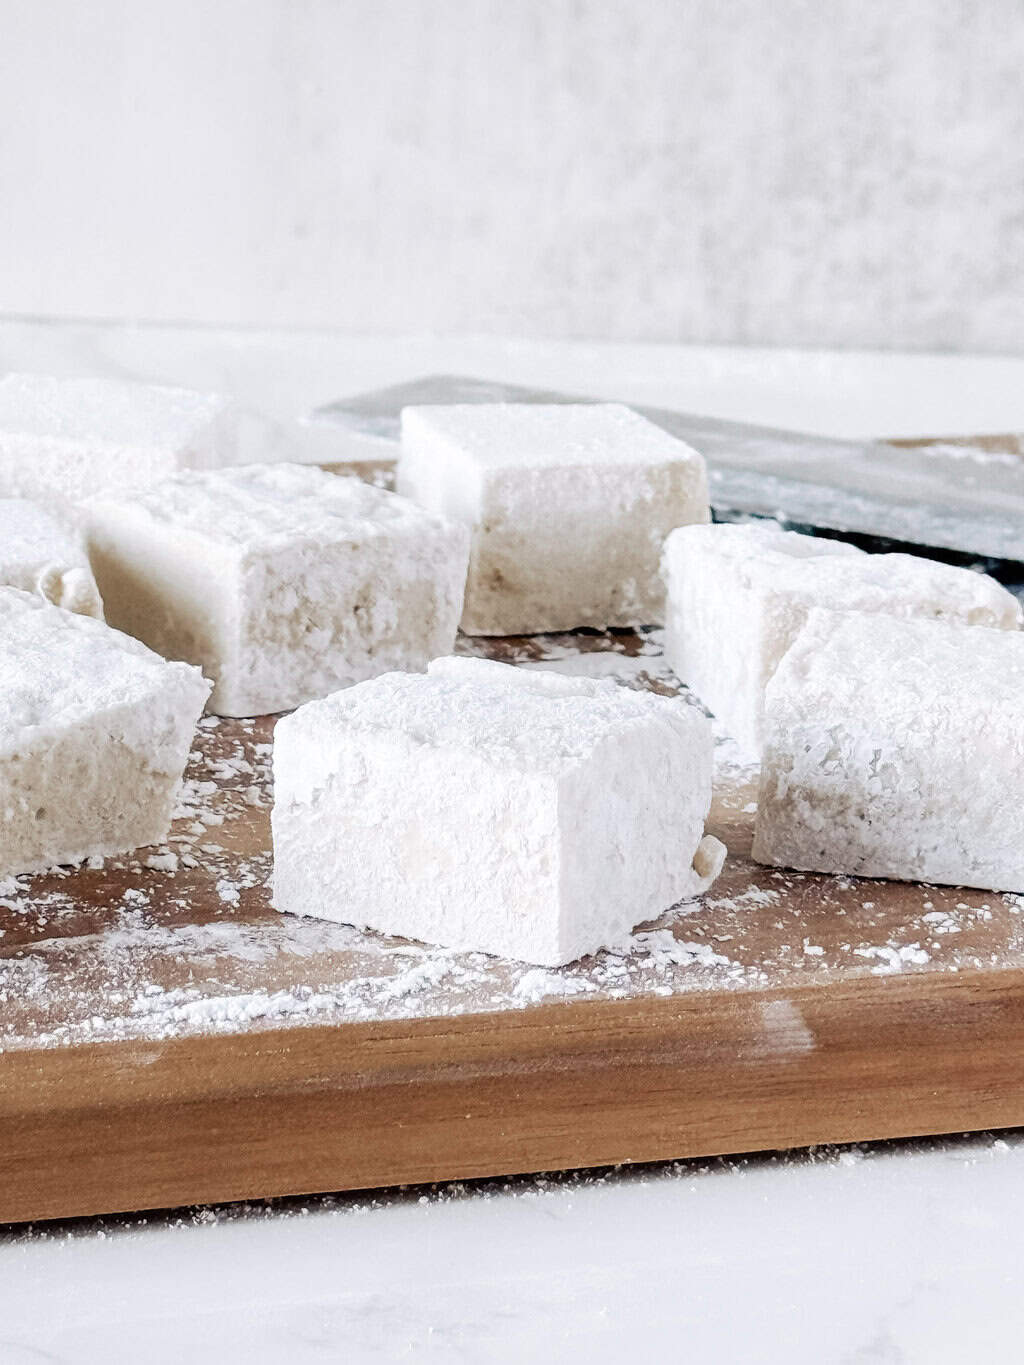
Once it is set, carefully remove it from the baking dish and the parchment paper, and place it on a surface dusted with powdered sugar or arrowroot powder.
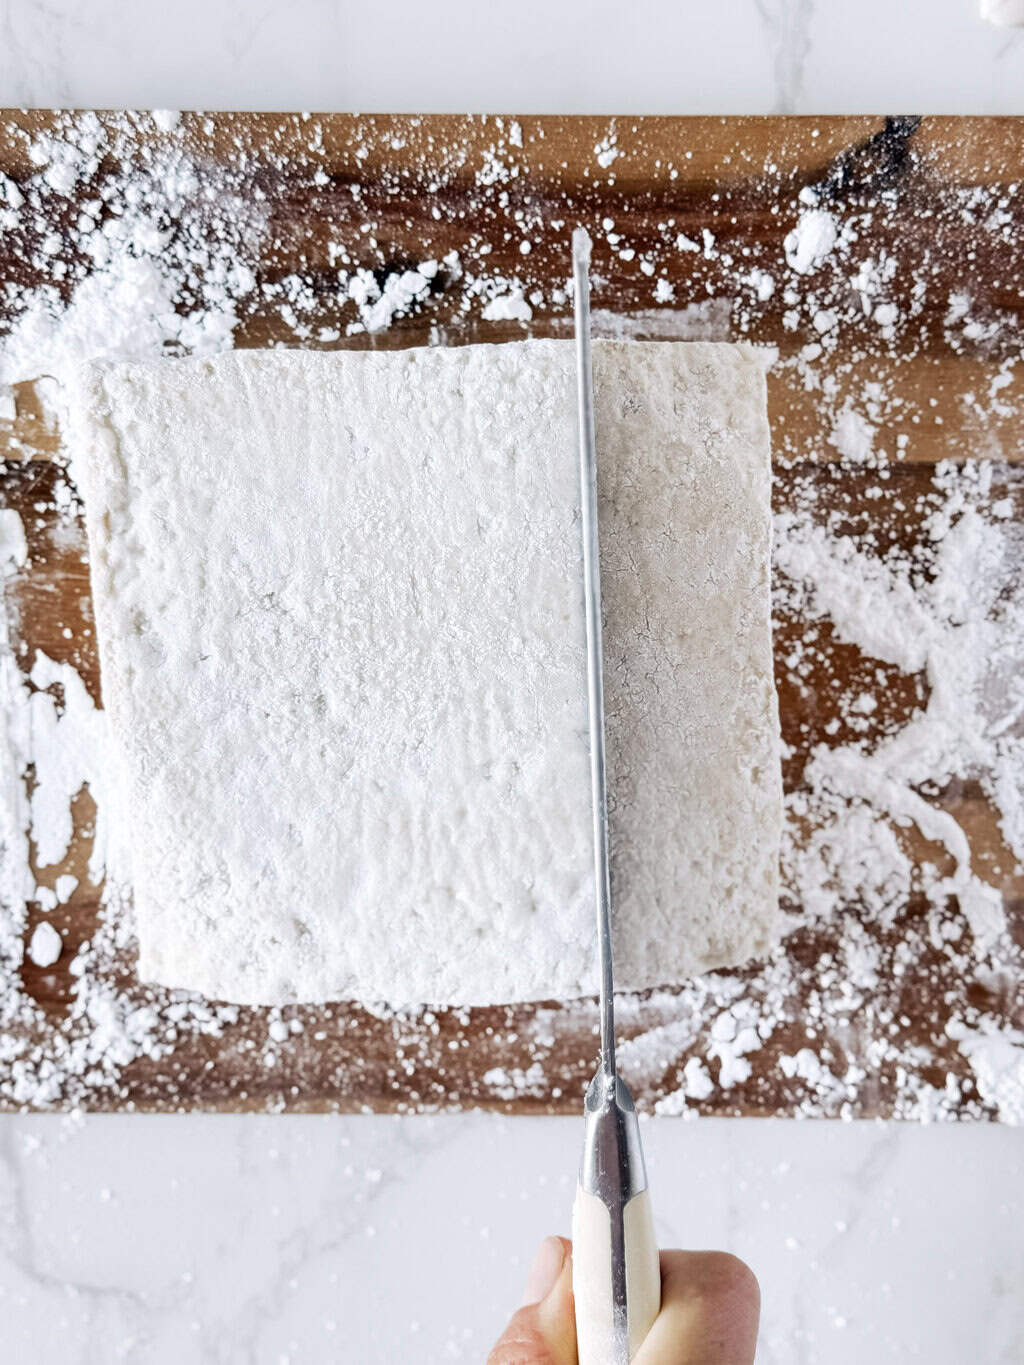
Then cut it up into squares or your preferred shape. You may need to spray the knife with cooking spray or dust it with powdered sugar or arrowroot powder to prevent sticking.
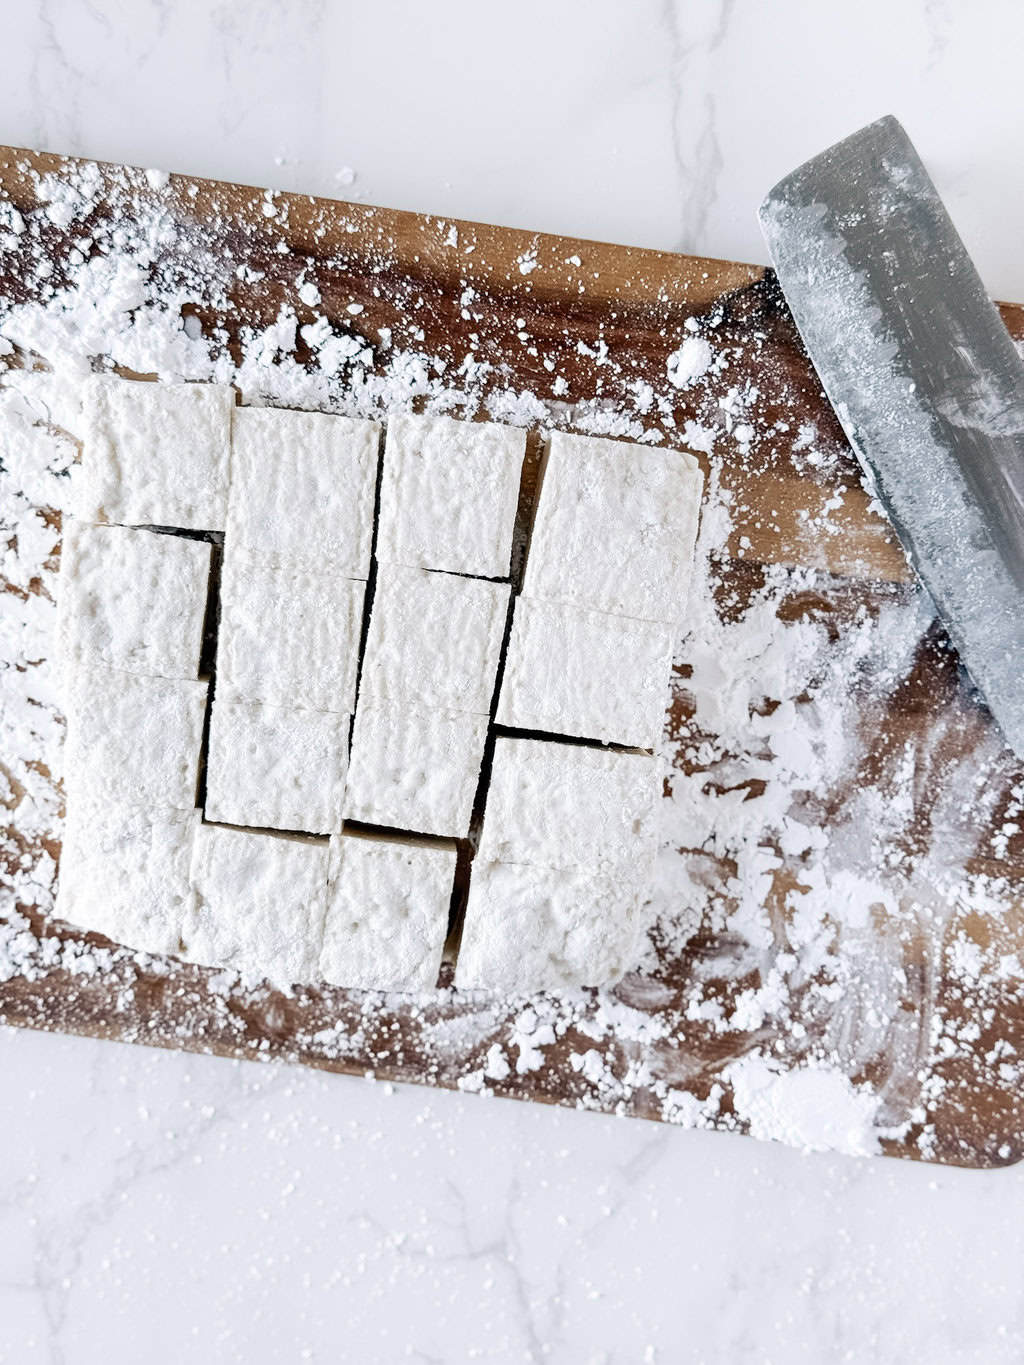
Toss the marshmallow squares lightly in powdered sugar or arrowroot powder to prevent sticking.
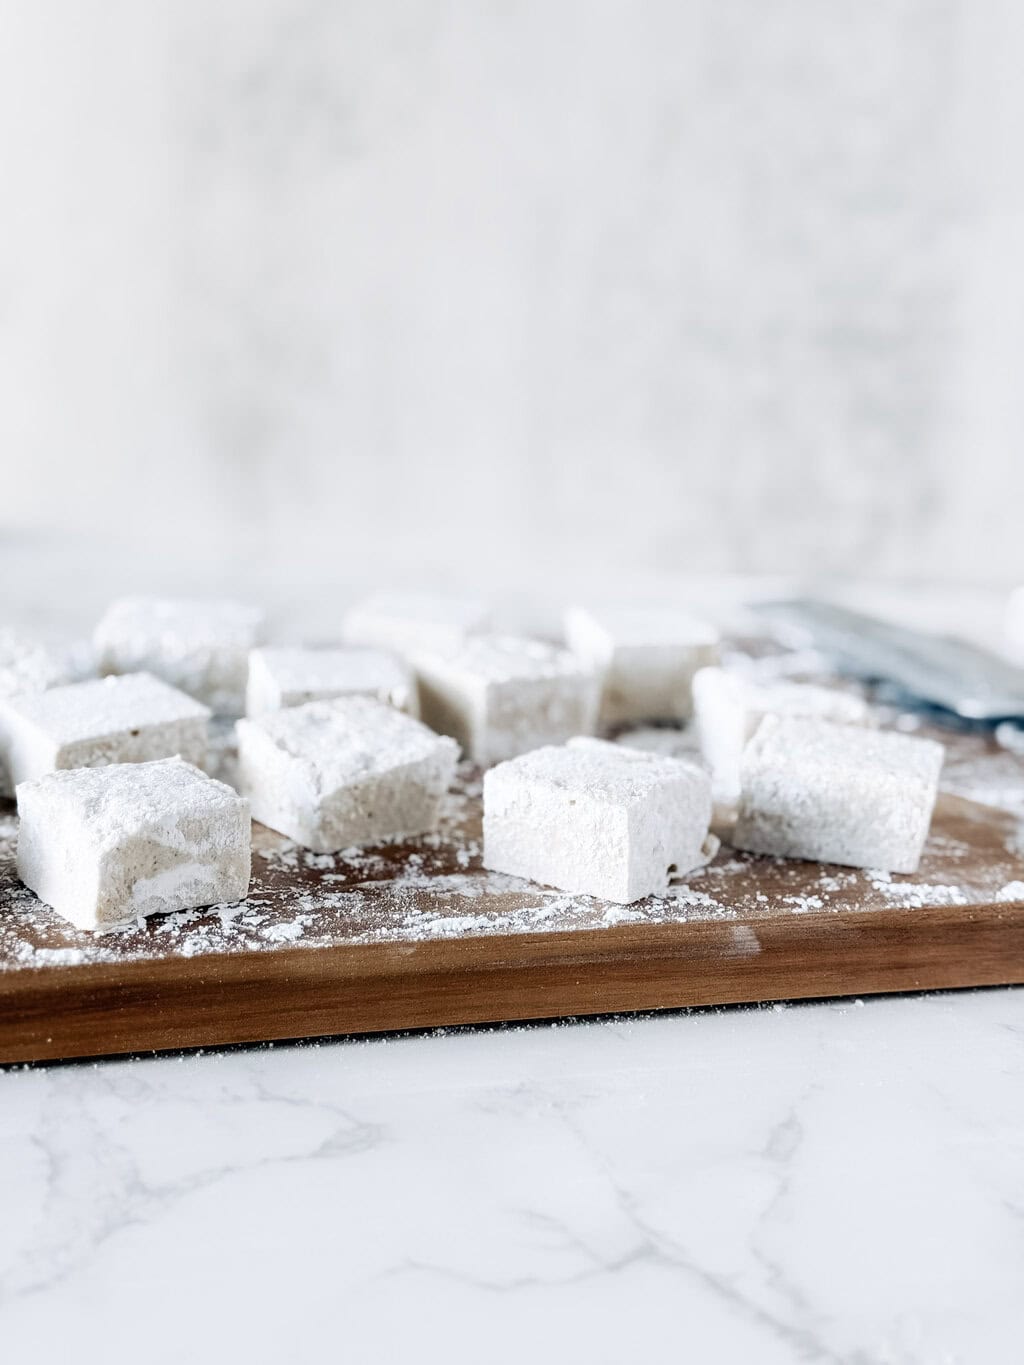
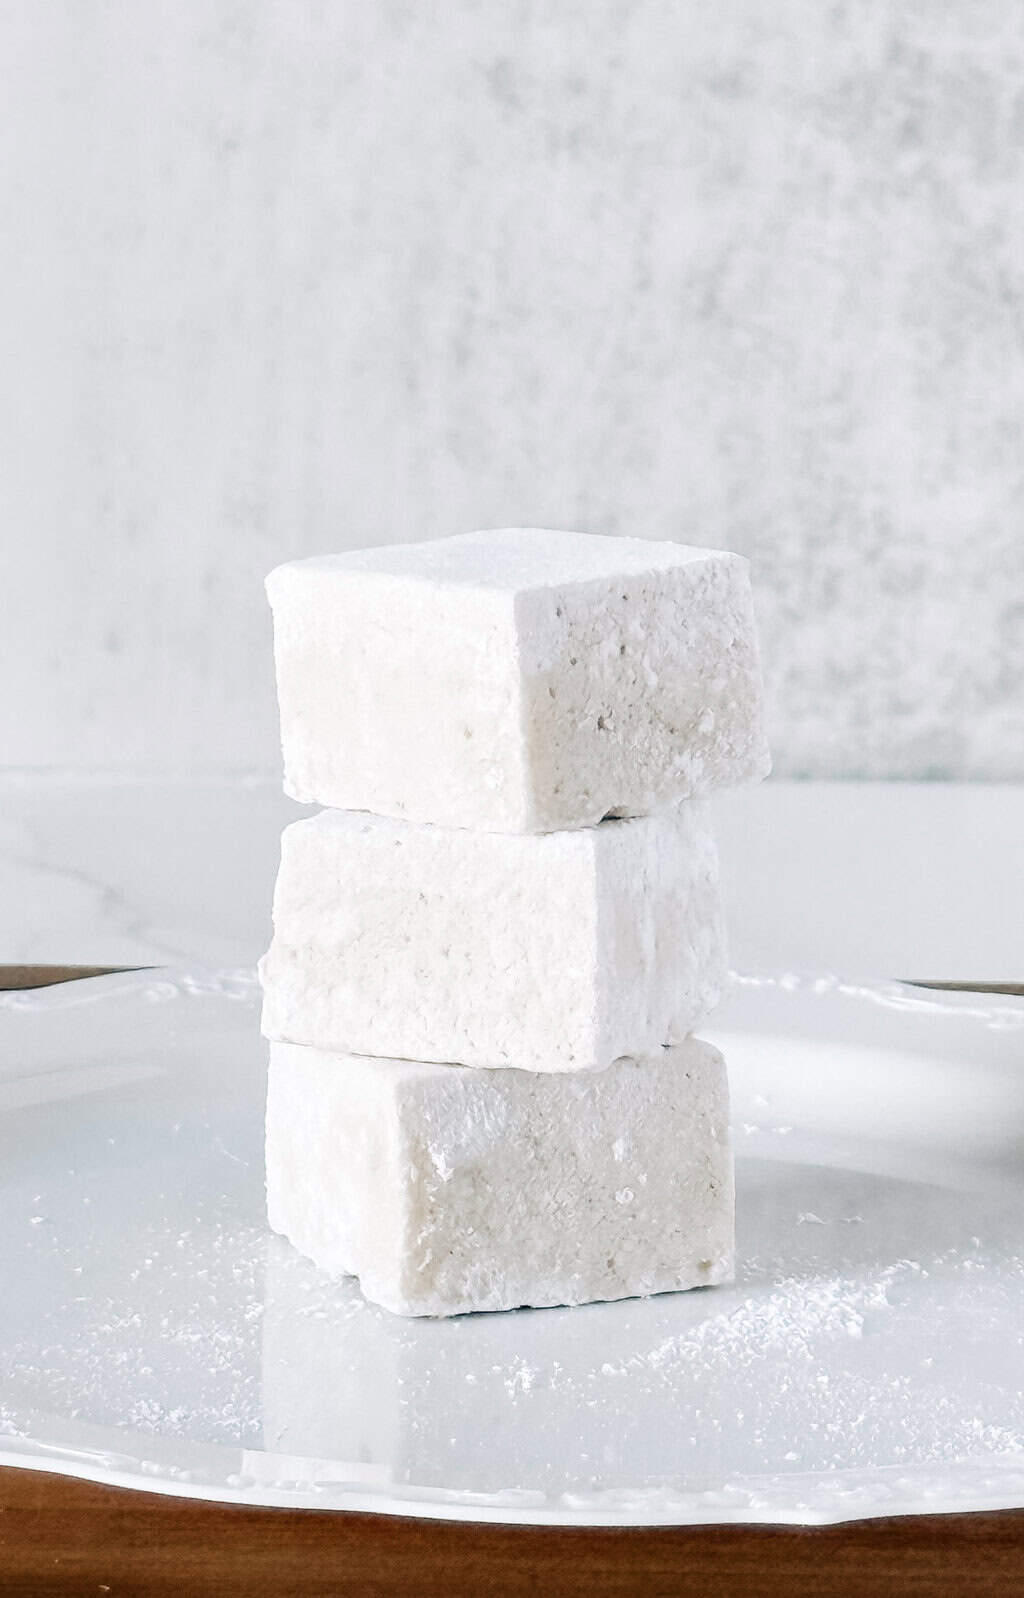
These homemade marshmallows can be eaten right away or used for s’mores or hot cocoa. They can also be saved for later.
Easy Homemade Marshmallows

Soft, fluffy, and naturally sweetened with maple syrup—these homemade marshmallows are unbelievably easy to make and are perfect for hot cocoa, gifting, or snacking.
Ingredients
- grass-fed beef gelatin
- maple syrup
- water
- sea salt
- vanilla extract
- powdered sugar or arrowroot powder
Other Items You’ll Need
Instructions
- Line baking dish with parchment paper
- Sprinkle parchment paper generously with powdered sugar or arrowroot powder
- Add a 1/2 cup of water, 1 cup of maple syrup, and 1/4 teaspoon of sea salt to a saucepan
- Cook over low to medium heat until it reaches 240°F. This will take 15-20 minutes (keep it on low to medium heat and don’t stir)
- While the syrup mixture is heating, add a 1/2 cup of water to a medium to large bowl if you’re using a hand mixer, or to the stand mixer bowl if you’re using a stand mixer
- Sprinkle 3 tablespoons of gelatin into the water
- Carefully stir the gelatin into the water until there are no dry chunks
- Allow the gelatin to bloom for at least 10 minutes
- When the syrup mixture reaches 240°F, turn off the heat
- With the mixer on low, slowly pour the hot syrup into the bloomed gelatin
- Increase speed to high and whip for 7–10 minutes
- Mix in 1 teaspoon of vanilla extract during the last 30 seconds
- Stop mixing when the marshmallow is thick, glossy, and fluffy (this should take around 7-10 minutes)
- Whip just until thick and fluffy (when drizzled back into the bowl, the marshmallow should briefly hold its shape before slowly melting back into itself)
- Then quickly (very, very quickly) pour the marshmallow into the parchment-lined dish
- Quickly smooth out the top with a spatula, then dust it lightly with powdered sugar
- Let it set uncovered at room temperature for 4–6 hours or preferably overnight
- Once it is set, carefully remove it from the baking dish and the parchment paper, and place it on a surface dusted with powdered sugar or arrowroot powder
- Then cut it up into squares or your preferred shape (you may need to spray the knife with cooking spray or dust it with powdered sugar or arrowroot powder to prevent sticking)
- Toss the marshmallow squares lightly in powdered sugar or arrowroot powder to prevent sticking
- These homemade marshmallows can be eaten right away or used for s’mores or hot cocoa
Notes
- Homemade marshmallows can be stored in an airtight container at room temperature for up to 2 weeks. I don’t recommend refrigerating them because it can cause moisture issues.
- Homemade marshmallows should stay good for at least two weeks when stored properly.
Recommended Products
As an Amazon Associate and member of other affiliate programs, I earn from qualifying purchases.


Frequently Asked Questions
How Do You Store Homemade Marshmallows?
Homemade marshmallows can be stored in an airtight container at room temperature for up to 2 weeks. I don’t recommend refrigerating them because it can cause moisture issues.
When Do Homemade Marshmallows Expire?
Homemade marshmallows should stay good for at least two weeks when stored properly.
Discard them if you observe mold or fuzzy spots, a sour or fermented odor, excess moisture, or weeping.
Why Didn’t My Marshmallows Set Properly?
This can happen if the sugar syrup didn’t reach 240°F (soft-ball stage) or if the mixture wasn’t whipped long enough to incorporate air.
If the marshmallows start to set before you can transfer them to the dish, you’ve over-whipped.
If it pours well into the dish but still contains excess moisture when you try to remove it, you’ve either underwhipped or not let it sit long enough.
Why Did My Homemade Marshmallows Collapse Or Deflate?
This usually happens if the mixture was under-whipped or if the hot syrup was added too quickly before the gelatin was fully incorporated.
Can I Add Flavors Or Colors To Homemade Marshmallows?
Yes! Add extracts, cocoa powder, spices, or natural food coloring during the final minute of whipping.
How Many Marshmallows Does This Recipe Make?
This recipe will make 16 one-inch square marshmallows. However, you can cut them into whatever size or shape you want.
Are Homemade Marshmallows Gluten-Free?
Yes, as long as all ingredients used (especially gelatin and powdered sugar) are certified gluten-free.
Can I Make Homemade Marshmallows Without A Candy Thermometer?
A candy thermometer is strongly recommended. Without it, it’s difficult to know when the syrup has reached the correct temperature for proper setting.
I’ve made homemade marshmallows without a thermometer, but only after making them several times with a thermometer, so I knew exactly how long it took to reach the proper temperature.
Final Thoughts
I hope you love these homemade marshmallows as much as I do. They are very easy to make once you get the hang of it, but they can require a bit of trial and error.
Please let me know if you have any questions or comments!

